
It's important to remember that the goal of Death is still death for your opponent. But there's a plethora of ways to skin a cat. Death for you opponent can now come from direct damage and Double Attack. There's other ways besides spells to clear the field, and weapons are no longer necessary as a crutch to fix the early game. You can now rush your opponents and cover your options safely without fear of too much backlash from aggro. Even beyond that, you can now create complicated maneuvers to beat your opponent at the very game they play. If you're interested in pulling off Katana World mechanics while hitting harder than Danger World, then you've come to the right place.
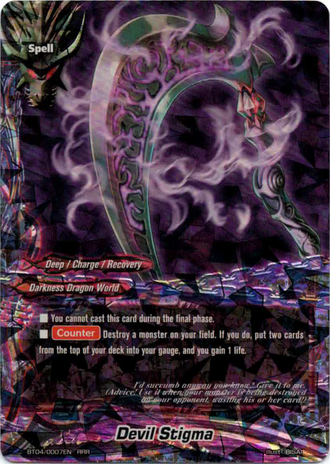
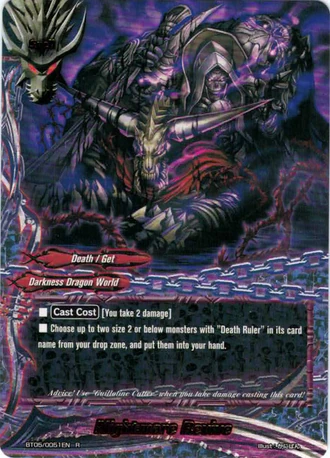
Death Rulers has a very straightforward playstyle: keep attacking the player. This is aggression at its finest. To fuel this non-stop aggression, they spend their time mostly countering opponent attacks - but they do have nice gauge-gain options through Devil Stigma and Death Wizard Dragon. Hand-wise, they have Abyss Symphony and Nightmare Revive to get cards but that kicks in towards the midgame. The winning image? Slamming down Judgement Day with a full field of 2-crit Shadow Dive Size 1's.
Memento Mori - Death Rulers
Size 3
Size 1
Size 0
Spells- 2 Abyss Symphony
- 2 Nightmare Revive
- 3 Judgement Day
- 2 Devil Stigma
- 4 Death Grip
- 3 Black Agenda
- 3 Accel End
- 4 Black Dragon Shield
- 2 Guillotine Cutter
Deck Deconstruction
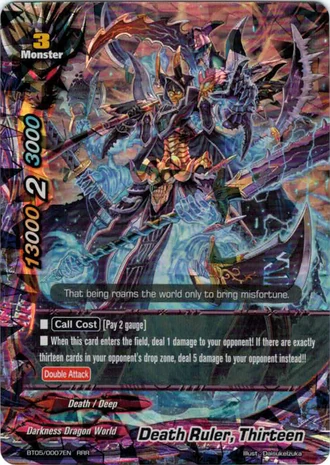
If they're at 11 or 12 cards in the drop zone, you can actually fix that for them. With cards like Death Grip and Guillotine Cutter you can remove cards on the field for your opponent. If you want to support Thirteen even more, you can run the cheesiest of cards like Redupsion Blood. Your opponent has to take all of these factors into consideration during the entire early game as they warily count their drop zone. The reality is that the threat of Thirteen takes place as soon as the game starts. Your opponent has to carefully hit about 10 in drop, then rush to 14 in a single turn, which means before that your opponent can't stop at 9 and safely progress through a normal turn. When you realize just how brutal this card is for your opponent to deal with, you can start to see the various ways you can abuse this card to force your opponent to cry.
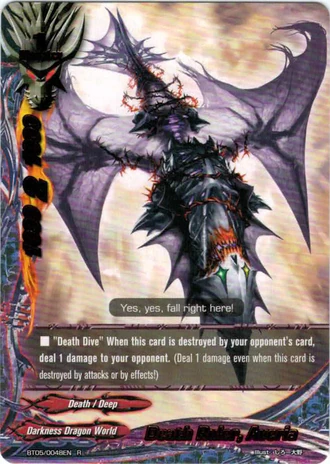
 Even without dealing 5 direct damage (and just dealing 1), you still get a Double Attacker for 2 gauge. He even has the most ridiculous 13000 power backing him up (but a tragic 3000 defense). You should have a backup plan against specific matchups like Dungeon and Magic, where defense-based spell removal is a thing.
Death Wizard Dragon is really important to control your life and hit those ever-important Life Break points to access your hand-gaining spells. I'd run more, but unfortunately this deck works a bit differently than most DDW builds thanks to Gallows, to the point where self-inflicting damage isn't the best way to go around things.
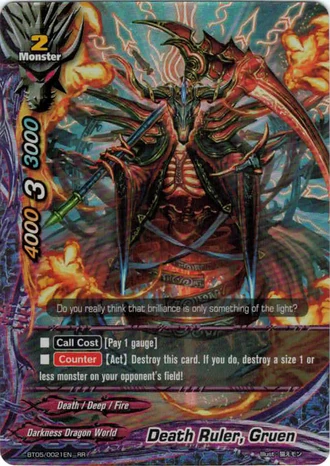
 New cards in the Size 2 lineup include Gruen. Lots and lots of Gruen. Gruen is love. Gruen is life. Gruen is 3-crit. Gruen is Sudden DEATH! as a monster. As a counter Act, you can pay 1 gauge (from his on-play) and destroy him to kill a Size 1 or less. It gets better. Since the effect says "destroys", you can use it to trigger the activation effects of Redupsion Blood and Black Agenda. Are you beginning to see how the plays work? I'll cover all of them in a future section, but start your imaginations now.
You also run Masterminds to get your field up early. The number of cards delegated to Gruen and Mastermind are actually flexible. I choose Gruen over Mastermind because 3 crit is better and Gruen synergizes well with other cards. Technically, they're the same in advantage and both work equally well as Death Rulers.
Size 0's because they are good with your Size 2's and Size 3's.
But the real highlight of new Death is definitely Black Agenda. This card is so important that I'm running it at 3 copies even though you can set at most 1. It's just as important as Green Dragon Song for control Armordragons. Every time a monster dies on your left or right, you can convert that into a free card that you salvage. You have to target Size 1's, but that's perfectly fine since your Size 1's are your stars. Normally you would think to just call Burial if Gallows died or Gallows if Burial died, but guess what? You don't have to call it to the same position. Oh yes.
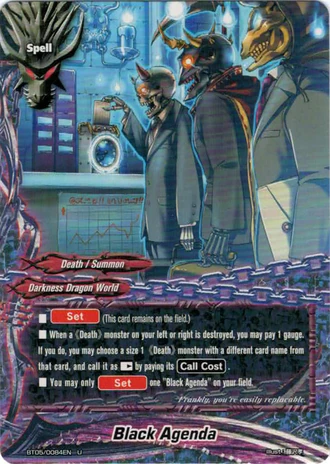
Let's go next level. Call Gruen to the side and Averia to the center. Let Averia die (your opponent isn't going to target Gruen lol). Then, before your opponent attacks again, activate Gruen and kill an opposing Size 1. Black Agenda triggers and you get to call Averia again to your center. Instead of dealing damage to you, your opponent just found himself eating 2 damage on 2 separate occasions. Gruen isn't the only card you can do this with. This also works with Devil Stigma on practically anything you can call to the side. The plays just simply never end.
Sideboard Ideas
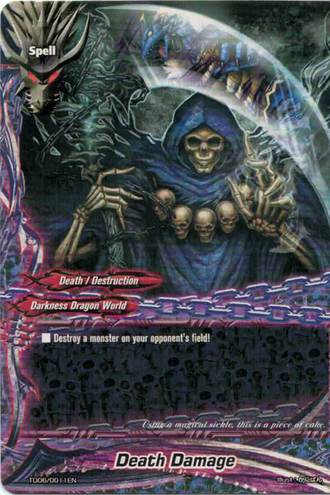
Spells are pretty set, though you should have some Death Shields and Midnight Shadows to use against certain matchups (Dungeon and Dragon). Oh, and Death Damage. Against Danger, that's a really good card to have (bye bye Demon). Redupsion Blood is the cheesy tech you might want to consider, but I wouldn't even bother. You could also run Death Counters but those won't be countering much in this deck.
Sample Sideboard:
- 2 Death Damage
- 1 Judgement Day
- 1 Abyss Symphony
- 2 Midnight Shadow
- 1 Devil Stigma
- 2 Death Ruler, Soulbreaker
Other Options
Avoid Running
4 Deathgaze? Non-Death monsters?I've already given my opinion on Death Shield. Sudden DEATH! is superior (and you're not even running those anymore), since you can get rid of threats like Tetsuya before they become a problem.
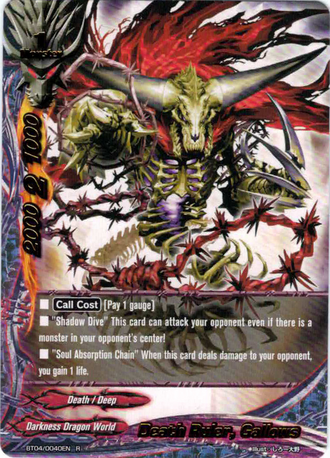
Oh, and don't run the Shadow Dive weapon. 1 crit is weak. You'd do better with Death Scythe, since it deals 2 damage direct and gets that 1 damage anyways from just killing something. But you don't even need weapons now that you have Averia.
Counters

You rush hard, but some decks can heal harder. Ironically, you'll probably be crying against a Blue Sky Knights deck. Thunder Knights, on the other hand, will fare rather poorly as Moving makes literally no difference and you won't be proccing Dragobond, at least not on your turn. If you don't get your Black Dragon Shields, you'll pretty much immediately die against Dungeon but hey, that's probably the same for any deck. At least you won't have to be worried about proccing Nazaro Hot Spring (basically, since you're ignoring their monsters for the most part a lot of anti-destruction cards become dead in their hand). Death Rulers completely melts through Magic and Katana though, since their life gains are really poor. If you meet Ancient World, however, prepare to meet your maker. Facing Danger World is equally unfavorable. God help you if they manage to get Demongodol Ark out.
Final Words
I basically made this deck for Dekmori. Death.This deck is so autopilot, any noob could play it, death. The most important decisions to make are what you charge away, death. Try to hold on to the Abyss Symphonies and Nightmare Revive for those rainy days, and feel free to say goodbye to Judgement Day in favor of more immediate gains, death. Also, be sure to attempt those OTKs because they do happen, death. Quite often, death.
I'll also be looking for deck names for this deck, death. The naming period will last for one week, death, after which I will choose my favorite (along with any others I liked). The chosen name will be granted to this decklist, death. I'm expecting great things, death!
...this death thing is getting old. Doesn't she get tired of saying "desu" in a very heavy accent at the end of every single sentence, even ones that don't need "desu"?
If the references in this decklist don't make any sense to you, just go watch Chuunibyou.
Update: I didn't get a lot of submissions for this deck, which is kinda depressing, but that's totally fine because somebody pulled an accidental genius play. So sly, referencing the one and only true lover of the Deko-chan in a Latin phrase that reminds the opponent of their only fate when facing Death Rulers. Because Mori means Death in Latin and Forest in Japanese, and that must be destiny. Also her name is freaking Dekomori.
Winner of the deck-naming challenge: Chris Colon @ Memento Mori

- updated to BT05, CP01, EB02, TD07 -
All images used obtained from the official Bushiroad website and used here solely for reference purposes. Future Card Buddyfight!, logos, and respective content belong to Bushiroad. Large images belong to the Buddyfight! Wikia.
please name the deck "Desu-shi" in honor of President Shidou-sama!! Please����
ReplyDelete"Memento Mori". "Remember, you will die". Sounds fitting enough for me.
ReplyDeleteHow practical would it be to swap out Deathgaze for this new promo?
ReplyDeletePurgatory Knights, Troubadour Dragon
Size 1
Attributes: Armordragon/White Dragon
6000/2/2000
This card cannot be called to the center.
It's not Death attribute like DGD is, but it gives all that magical-number-hitting coolness as DGD without having to drop any gauge.
Deathgaze might actually be better. In this deck, Deathgaze is used with its synergy with Alea to kill big bosses while doing good damage for killing monsters.
DeleteThis may seem pointless but why not death ruler executei instead of black dragon death hang?
ReplyDelete3000 defense conveniently dodges Ancient World's 2000 defense counter.
DeleteSo we only need swap Gespenst with Gallows SD and there's nothing else we need to change?
ReplyDeleteAlso, how about dropping 1 Gruen + 1 Thirteen for 2 more Gallows SD?
No one is probably gonna reply this, but why is this outdated? It's doesn't make use of the recent cards, but it seems okayish/good.
ReplyDelete