I'm sure I'm not the only person who has found the Buddyfight gameplay mechanics to be a bit...well, a bit confusing. Unlike Vanguard and Weiss Schwarz, Buddyfight attempts to emulate the likes of Yugioh with the idea of "Play Timings", or periods of the game where certain events like using an ability or casting a spell can happen. Unfortunately, since Bushiroad as a company has no prior experience with this kind of a card game, their explanation and interpretation of this concept is vague at best. In short, while they do know what they're doing with the game, they just can't seem to put it to words quite well.
Luckily, I am quite a verbose blogger and have some repertoire of playing a variety of card games that feature these "Play Timing"-like occurrences. After negotiating with Bushiroad SEA, Bushiroad JPN, Bushiroad NA, various Bushiroad judges and a host of experienced players, I have finally come to the point where I am more than comfortable with the way Buddyfight flows as a game from turn to turn. Of course, I would love to share this information and knowledge with the rest of us. Thus, I have actually created my own Buddyfight flowchart, complete with the correct timings for virtually everything in the game. And it's available for anyone to use and download. Enjoy.
But of course I'm putting the link after the page break so that people will actually read my article.
Changelog:
- Version 1.1.0_1 - Corrected misorder in "Details of a Cast"
- Version 1.1.0_0 - Major Update: Added "Abilities" and "Others" section, revamped other sections to reflect Bushiroad's 1.03 update, changed color assignments
- Version 1.0.1_1 - Changed some formatting issues
- Version 1.0.1_0 - Updated Attack Phase orders to properly reflect counter restrictions, changed header fonts
- Version 1.0.0_3 - Aesthetic changes
- Version 1.0.0_2 - Removed extra Play Timing during Attack Phase (prev. Step 2)
- Version 1.0.0_1 - Moved Counter Timing of "Details of a Cast" to after the Pay Costs step
- Version 1.0.0_0 - Original
You can download it and look at it for a bit. Feel free to redistribute the resource in whatever way you want. All I ask is that you don't lie and claim ownership of it because I actually worked pretty hard getting it all together. I'll use the rest of the article to explain step-by-step how it all works and what everything means.
Phases of the Game - Page 1
The first page shows in large how a player's turn looks. There are five distinct parts to a player's turn: Stand and Draw, Charge and Draw, Main Phase, Attack Phase, and Final Phase. Each phase serves as a way to dictate what can or cannot be done over the course of a turn.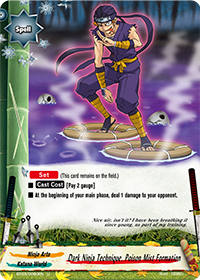 |
| Personally, I dislike toxic players |
This should generally seem pretty obvious, so let me make mention of a few particular details. Detail 1: while Buddyfight does not officially state that there are Play Timings after Stand and Draw and Charge and Draw, I'm fairly certain there are. In the future, when there may be certain cards/abilities that activate when a player draws a card, Play Timings after these events will allow players to use these cards/abilities. They also serve as a Resolution Check (Page 2) to determine if a player loses from decking out.
 |
| Do you have time to hear about our lord and savior Thousand Rapier Dragon? |
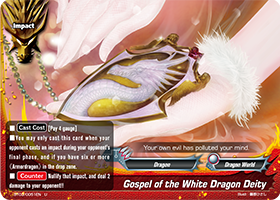
Detail 3: This should be obvious, but Impact Play Timing occurs after the Play Timing for abilities that activate "at the beginning of your final phase". Also please note that "your" can be substituted with "the", "your opponent's", or whatever the actual card may say.
Main Phase Actions - Page 2
 |
| Max scroll these ninja boots |
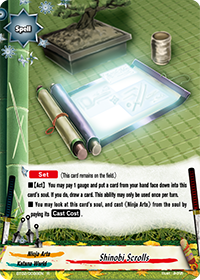
Blue shows where the Play Timings are located. These Play Timings allow the non-turn player to cast Counters during the opponent's Main Phase (see Page 4). Even if the turn player attempts to "skip" the Main Phase by not performing any actions, however, the Play Timing at the beginning of the Main Phase will still activate, giving the non-turn player at least 1 chance to cast Counters during the turn player's Main Phase. When a Play Timing is finished, the game goes back to the turn player's Main Phase.
Finally, gray notes where the Resolution Checks are located. A Resolution Check is written out in full in the actual document, but for reference's sake I'll post it here:
Resolution Check:
- The fighter loses when his or her "Life is at 0" and/or the fighter has "No cards left in his or her deck"
- If there are two or more monsters or items in the same area, put a monster or item other than the last card to be called or put to the same area into the fighter's drop zone
- When the total size of all monsters on the fighter's field is 3 or greater, put monsters other than the last monster called to the drop zone until the total size becomes 3
Essentially, a Resolution Check is the way Buddyfight updates the current status of the game. There is technically no way to lose without hitting a Resolution Check (unless a card/ability explicitly states so, like Tempest Enforcer). For this reason, Resolution Checks are basically everywhere, placed wherever the game designers felt a player could possibly lose the game.
 |
| Lifelink will still activate! |
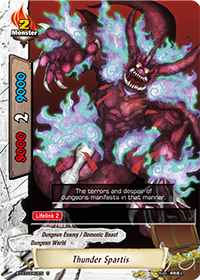
One last thing. Since the Counter Timing for a call is before the monster is actually placed on the field, please don't try to use something like Dragonic Thunder during the call. There's a Play Timing immediately after the call where you can actually target the called monster. The Counter Timing before the call is used to either A. Negate the call using a card like Begone!! or B. Alter the field in various ways before the monster is called. For instance, if you opponent declares calling Demon Lord, Asmodai and you don't want your monster to die, you can use this Counter Timing to cast Magical Goodbye and bounce your monster to your hand so that when Asmodai hits the field, there will be no targets for him to Dangerous Back-drop!
Details of an Attack - Page 3
 |
| Quick! Which step should this card be used? |
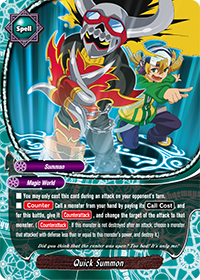
During "battle", players are limited to 1 Counter only. This no longer applies just to chains, but to the entire "battle" period. It's important to make this one Counter matter, and to predict what your opponent's one Counter will be and, well, counter it. Attacks are very special because, unlike abilities or spells, the turn player has a chance to counter the Counter of the non-turn player. This will be further clarified and explained in the following section.
If you choose to not attack for some reason, Buddyfight actually has this weird catch that gives both players a Play Timing, and then gives the turn player another chance to attack. It's like they're telling you to reconsider not attacking. This mechanic is put in to stop loopholes during the Attack Phase, but it ends up creating this weird little loophole of its own. I highly doubt there's any way to use it, though, since you already get a Play Timing for the beginning of Attack Phase.
Last but not least, in Step 8, technically Double Attack and related abilities activate before any other abilities/cards that can be used during this Play Timing.
Play Timing - Page 4
So finally, we're at this fabled "Play Timing" section. This is where it gets confusing for most people, but it's actually quite simple.
 |
| The un-Counter-able |
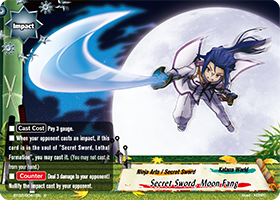
During a Play Timing, the turn player gets the first say. The turn player may use any card/ability, which the non-turn player may counter. After the turn player's effect resolves (follow the red arrow), the flow of game skips back to the first Resolution Check and proceeds to give the turn player the chance to use any card/ability again. Once the turn player chooses not to use a card/ability, the non-turn player can choose to use 1 Counter. This time, the turn player can respond with his or her own Counter. The turn player's Counter resolves first, followed by the non-turn player's Counter. Then (follow the red arrow to the first red arrow), the flow of game skips back to the very first Resolution Check and proceeds to give the turn player the chance to use any card/ability again. Yes, you read correctly. Once the non-turn player uses a Counter not in reaction to the turn player's card/ability, the turn player can once again use cards/abilities even though they chose not to before.
For example, it's my turn and I hit a Play Timing during my Attack Phase. I choose to use Yamigitsune's To Darkness to send a Kimensai to the drop zone to draw a card. My opponent uses Dragonic Thunder as a Counter to To Darkness and destroys Kimensai before I can send it to the drop (why, I have no idea). To Darkness fails to resolve, and I decide to not use any other cards/abilities. My opponent decides to use Dragon's Seal, being at 3 life, and calls a Thousand Rapier Dragon to his center. Now the Play Timing comes back to me, and I would be allowed to use a card/ability again.
Hot off the press! Apparently all [Auto] abilities (basically every ability that isn't activated) start their own chain on the Play Timing stack, even if you choose not to use them or even fail the requirements to resolve them. As long as the requirements to activate are fulfilled, the abilities will be put on stand-by and give your opponents a chance to Counter, even if you want nothing to do with the ability. This weird loophole allows players to abuse the "1-chain max" rule and guarantee uncounterable spells in crucial moments of the game, like during attacks. This will be covered in a later article, but for now know that this is a thing and it exists.
When both players finally call it quits, a Resolution Check occurs and the Play Timing is over.
In Conclusion
Sometimes, all it takes to get better at a game is to have a clearer understanding of the rules. Buddyfight has its share of confusing mechanics and gameplay, but knowing exactly what the rules are will easily lead to a better understanding of card advantage, strategies, tactics, you name it.
For casual play, these detailed rules may be glossed over from time to time. But in competitive, high-stakes tournament play, it's important to perform each and every step. Declare a monster call before actually playing the monster. Declare an attack before actually resting the attackers. Wait to see if your opponent has some sort of response or counter, because chances are, they do. Always ask for a confirmation, an "OK" before proceeding with the next step. Always declare the start of each phase so that the Play Timings can be clearly defined and utilized.
Anyways, it's my dream that this document that I created could be more useful than the offical Detailed Rules PDF on the Buddyfight website. We can always dream big.
 |
| Some dream bigger than others...and some make their dreams their reality |
All images were used obtained from the official Bushiroad website and used here solely for reference purposes. Future Card Buddyfight!, logos, and respective content belong to Bushiroad. Large images belong to the Buddyfight! Wikia.


Very enlightening article. So this means I can't use Skies in Your Hand to make an opponent waste Thunder Devastation, huh? Boo. : / Also, would it be okay with you if I emailed you some questions about the game and about my deck? I'm fairly new to the game, so I could use all the help I can get.
ReplyDeleteUmm, you can...it's just 1 Counter and it only goes 1 chain deep. That's perfectly fine.
DeleteFeel free to email me at blaise.tensai@gmail.com
Woops, I looked at Act on your flowchart instead of Cast, my bad. And will do.
DeleteAfter my asmodai entered the field, I discarded a card from my hand then destroyed the pile bunker on my opponent's field.Can my opponent cast dragobond on his pile bunker dragon after I designated it as a target of my dangerous backdrop?
ReplyDeleteYes he can, as long as the Pile Bunker Dragon is on the opponent's left or right.
DeleteIf that's the case, can I cancel the execution of dangerous backdrop since it says "you MAY discard a card from your hand"?
DeleteThis comment has been removed by the author.
DeleteEDIT: Looks like I was wrong! Since Asmodai's "discard 1 card" is a part of it's resolution, you can choose to not discard the card when you resolve the card, which is after your opponent's Counter step.
DeleteI'd like to piggyback on a question involving Asmodai, at least indirectly.
DeleteI have a size three monster in center position, it doesn't matter which. During my turn, I call Demon Lord Asmodai to the right. If I understand the flowchart correctly, I cannot use Dangerous Backdrop without sending my size three monster to the drop zone, yes?
Yes. Resolution check happens before on-call effects happen.
DeleteRegarding the [Act] ability, the counter timing happens BEFORE paying the activation cost right? So if we already paid the cost, there's no room for counter?
ReplyDeleteYes. In other words, you declare the ability and ask your opponent if they would like to counter (if they don't know, inform them that this will be their only chance to counter). If they choose not to and you pay the cost, then it is too late for them to retaliate.
DeleteNote that this is only for [ACT] abilities during your main phase. If you activate an [ACT] ability as a counter, the cost will be paid first as per Play Timing regulations.
Question regarding when a monster is technically considered "destroyed". If I call a monster to my field that breaks the size limit and must send one or more monsters to the drop zone, are they considered destroyed? If so, does it matter if I call it on top of another monster or are all monsters sent to the drop zone during the main phase considered "destroyed". In very specific situations, I would like to call over a monster to trigger spells like Demon Way Geppakugiri. And if that works, because it would not be during a battle, would I then be able to use multiple copies of it?
ReplyDeleteAnd just so you know, I reference your work at our local tournaments when sticky situations arise. So, thank you.
Retiring monsters due to any rule or effect that does not explicitly state "destroy" does not count as destruction, but merely card placement. Thus, moving cards from field to drop due to effects like oversize, call on-top, and Armorknight Demon do not count as destruction. Hope that answers your question! And please share my work as much as you like :D I appreciate the support~
DeleteThat's exactly what I needed to know! I am just rounding out a deck build for my son using Katana world and thought I might give him a few tricks to play with. Three of my kids play in local tournaments and have never played any card fighting game of any kind. My 12 year old daughter uses a Supercell hybrid and has placed 2nd in the last two tournaments to long time card fighters (Dungeon and Danger of course). So thanks for a great head start.
DeleteI plan on having my son tech in Zantetsu for revenge on Dungeon until she figures our her sideboard, but from the look of the Danger World build she lost too, it shouldn't take much. It was close anyway.
My grad work was UCLA in Theatre/Film/Television and when we begin putting up Buddyfight videos on YouTube, you will most definitely be referenced and credited. It is actually now a class for them and they are memorizing all of the right steps to prepare for next year's regionals and hopefully beyond.
I know how University life can be, so thanks for taking the time to still update this site and I hope you start making some cash at is ASAP.
Hey Blaise! There are new rulings in the official website! Might want to check that out. Basically they added a new "ability" section. Also when the total size of all monsters on the fighter’s field is 3 or greater, put monsters other than the last monster called to the drop zone until the total size becomes 3.
ReplyDeleteHi Blaise.
ReplyDeleteThis should help for the Main Phase and hopefully just in General.
The easiest part to discuss it in on this page is the Main Phase.
All of the things mentioned:
Calling Monsters
Equipping Items
Casting Spells
Actually all happen during the 1 Play Timing between the Beginning of Main Phase Effects where Auto-Abilities are dealt with, TP choosing the order of theirs, with the NTP getting a chance to Counter, then the NTP doing the same with the TP getting a chance to Counter, etc...and the End of Phase Effects
All 4 Phases have types of both, save the Start Phase, which lacks an End of Phase place simply because no cards use it yet. The Start Phase has a Play Timing after the Start of Phase Effects, after Draw (Standing Monster, Items does not trigger one), after Charge and Draw.
Back to the Main Phase. Say it was the 1st Turn, basically, without using a Play Timing, no cards would ever enter the field and no beginning or ending of phases would process. Players would Draw, Charge and Draw until one person ran out of Cards and a Resolution Check hit.
The Buddy Call shown in the advanced rules, needed to show the life gain, the fact that a card can enter the field, etc..., but is, in fact, a Play Timing. When you see the Automatic Abilities talked about, that is what is happening in the beginning and ending phase effects. And with Automatic Abilities, once they are activated, they will resolve regardless of what happens to the Monster, etc... So, even if Evil in Heart's Ability is Activated and the Non-Turn Player uses a Counter to destroy him, his Automatic Ability will still Resolve, (To Darkness would resolve) allowing him to draw a card.
Hopefully this clears up some of the things you are redoing as the Advanced Rules continue to be updated. The Impact Monsters will be added soon as well.
I'm doing Video Tutorials on YouTube with the help of Bushiroad Support constantly confirming, clarifying and overall helping me greatly when I present how I believe the mechanics of Buddyfight Work. They have been patient, kind, and thorough.
ll be going over the Play Timing issue and Automatic Abilities in the first 2 Video Tutorials I post.
I sent them the layout for the “Automatic Ability” Video Tutorial which Activates Outlander on Call, and Boy Transformation and Evil in Heart at the same time in a Link Attack, so people can see how Abilities are sent to a “Queue” that are placed in Stand-by and then the Player that set them, in this case the TP, but the NTP can as well (Speed Summon, etc...) choose the order of Resolving them, and the other player has their regular Play Timing Counter they can use which would activate and resolve 1st as per normal.
Thanks for all the hard work.
Forgot. The YouTube channel just has a Promo showing the type and style of Animation I will use in the Tutorials. It's call Buddyfight Unified Universe. The first few Tutorials should be up soon. And thanks again for all your work on Buddyfight. I started reading the blog a long time ago.
Delete